There are several unique types of night crawlers around the globe, from the Arctic to the wilderness. Eisenia fetida is the one most effectively obtained in the United States and is suggested for fertilizing the soil use. In different nations, different species may be best. I propose you check with your administration rural assistance or nearby nursery club.
Eisenia fetida passes by
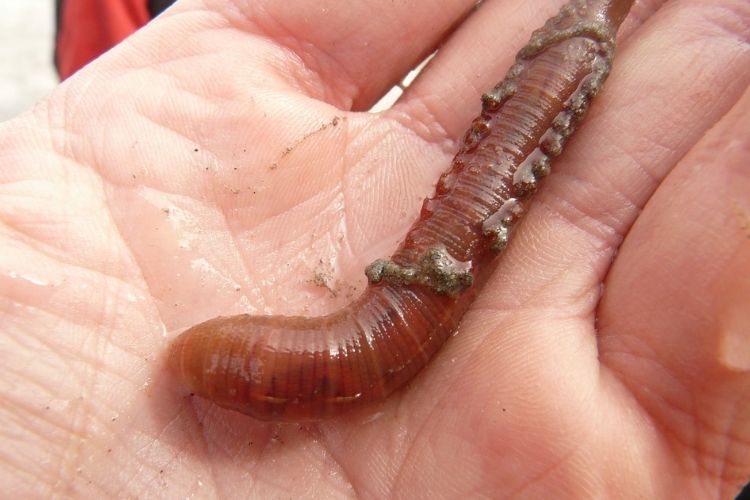
numerous basic names; fertilizer worms, fishing worms, brandlings, red wrigglers. Check the notices in the rear of practically any planting magazine and you’ll discover advertisements for them under at least one of these names. These worms don’t typically live in the dirt to such an extent as in fertilizer loads. They are not equivalent to nightcrawlers. Nightcrawlers will in general be lone worms with “domains” and they don’t do so well under the developing conditions portrayed here.
A pound of “bed run” worms will ordinarily cost under $30, postage-paid. Bed run implies astonishingly from the developing beds and will incorporate all sizes from worm eggs and recently incubated worms to enormous raisers. Except if you have a gigantic measure of fertilizer or manure to measure rapidly, a couple of pounds of bed run worms will be an adequate beginning. A few organizations additionally sell evaluated worms, as a rule in huge numbers.
At the point when first beginning, you will presumably need to contain your worms to a little territory. That way they are simpler to investigate, keep moist and feed. A simple method to do this is to locate an enormous plastic tub with a top and cut the base out. Locate an obscure spot and eliminate some dirt (around 6 inches deep is fine) from a region the size of the lower part of the tub. Set the tub set up and heap the dirt you eliminated around it, firming it down well. This arrangement will achieve two things. It will keep the worms moister and keep their food in one spot. Worms are savvy. However long there is food and dampness they will wait. In contrast to different critters, they won’t stray looking for greener fields! Interestingly, the tub will help shield them from creatures that will eat them like skunks and mice. On the off chance that you put your kitchen scraps in the tub it will likewise keep out homeless canines, felines, and javelinas (the wild pigs or peccaries of the desert).
Before your worms show up, wet the ground in your container and add some sort of natural issue, 2-3 inches thick. Fallen leaves are a decent beginning, or a little fertilizer. Grass clippings, old feed, spoiled fertilizer are altogether acceptable. So is destroyed paper. I shred all my garbage mail just as old monetary records, and everything goes to the worm box since there is no reusing program where I live. You simply need to be cautious that what you put in won’t warm up. At the point when your worms show up, simply dump them in, put on the cover and let them conform to their new home. In several days, when you lift the top, you will likely discover worms directly on top of the natural issue. They will jump down into their little tunnels when the light hits them. They very much want the dull. In a crate with a ton of worms, you can really hear them returning down in the event that it is tranquil and you listen cautiously. It seems as though small popping commotions.
On the off chance that you are utilizing your worms to compost your kitchen scraps, simply dump the pieces on top. The worms will go up into the pieces and start benefiting from their own. Try not to blend the pieces into the bedding, be that as it may, in the event that they should start to warm up. By leaving them on top, the worms can go down away from them on the off chance that they heat up. While you can take care of the worms just kitchen scraps, you will have a superior completed fertilizer with a superior scope of supplements in the event that you give them some different nourishments sporadically. As referenced, I shred all my garbage mail and feed it to the worms, simply dump it on top. Every so often, I sprinkle in some compost, typically 1-2 creeps all at once. About once every month I add a modest quantity of earth and a sprinkle of wood remains. In the event that your dirt is corrosive, you will need to add a cleaning of wood cinders or lime to your worm box each 1-2 months. Night crawlers like a pH scope of 6.8 to 7.2 (simply like most nursery plants).
On the off chance that bug creatures are not an issue or you simply need to add worms to your fertilizer heaps, things are significantly simpler. Scratch out 3-6 creeps of soil from the territory where you will construct your pile. On the off chance that you have constructed a heap on this site previously, simply leave two or three creeps of manure over the region all things considered. Wet it down well and add your worms. Assemble your fertilizer heap not surprisingly (there are countless articles wherever revealing to you how to manufacture manure heaps, I won’t delve into the subtleties here). Indeed, the heap should warm up, particularly on the off chance that you utilize a great deal of compost or green stuff. That is fine. The worms will remain down in the dirt under the load while this occurs. Right when the temperature goes beneath around 85-90 degrees Fahrenheit the worms will start to stir their way up into the heap. The main thing you need to do now is to keep the heap sodden. On the off chance that you live in a parched region, toss a canvas over it to help keep the dampness in. You can likewise cover the pile with soil or straw.
Following a few months (normally, cool climate will take longer) you will see that the surface of the heap has changed. It will likewise recoil a considerable lot. The surface change will be more perceptible in the event that you have covered the load with something that keeps out light, as the worms will work right to the outside of the heap. In the event that you covered it with straw, simply rake back the straw and look under it. Your manure should start to look more like clammy espresso beans than the first fixings. Now, it is prepared to utilize. You can just spread it around your nursery not surprisingly, or you can reap the worms it contains independently. I’ll reveal to you how in one moment.
First I need to examine another method of raising worms. I originally began bringing night crawlers up in the fertilizer under my bunny confines. This is an incredible method to hold down flies, as they don’t appear to raise in excrement that contains a great deal of worms. To raise worms thusly, wet the ground under one confine. In the event that the ground there is even with or over your walkway, at that point scratch the dirt out prior to wetting it. You simply need a little wretchedness, 3-6 inches deep to help contain the excrement. However long that is the main region that you keep soggy, the worms will remain there. They won’t go into dry soil if there is a clammy region. Presently add your worms and when they have gone down into the dirt, rake up all the excrement from under your other bunny confines onto the worm zone. Keep it soggy. In dry atmospheres, throughout the late spring this can mean a day by day sprinkle. In half a month, you will see that the main entire compost you see is the freshest. The worms will have processed the rest. Now, you can grow the region of the worm bed basically by wetting down a contiguous region and raking up the compost onto it.
I raised worms like this when I lived in eastern Texas. Our dirt there was extremely sandy and exceptionally corrosive, so I added lime and wood cinders about once every month. Spilled feed, hide, and straw from the home boxes were simply thrown on top of the worm beds. In a couple of days, there would be minimal left of them.
You would feel that all that clammy compost would be a breathtaking rearing spot for flies, however there were scarcely ever any worms to be found. The main spot I would see them in this framework was the point at which a bunny, typically a youthful buck, ceaselessly peed in one spot. This would make that territory extremely wet with smelling salts. To cure this, utilization your nursery fork to extricate up that spot and add something to ingest and kill the alkali. You can utilize sawdust, peat greenery or even the good old dirt kitty litter. Additionally, sprinkle on some additional lime or wood debris. Add more spongy material at whatever point you notice the region getting soaked once more.
Worms are not dynamic when the temperature dips under 50 or over 85 degrees Fahrenheit. On the off chance that your worm confine is the sun, within will be too blistering and the worms will remain down in the dirt to remain cool. In the event that the climate is freezing, they will go down to remain hotter. On the off chance that it gets truly cool they will sleep. In the event that it is excessively hot and they can’t get away, they will kick the bucket. In the most smoking piece of summer and the coldest piece of winter, you may see that the worms are not in the upper portion of your crate taking care of. In summer you may see some fly rearing in your kitchen scraps. In winter the pieces may basically get rotten or even stay there kind of solidified, rather than separating. Some assistance in summer is to cover the pieces with a little soil. In winter you can protect the worm box by heaping leaves or straw around it to help keep the worms hotter. You can likewise add genuinely thick layers of compost sometimes. The compost will warm a piece and keep the upper layers in the crate hotter.
On the off chance that you simply raise worms in your fertilizer heap, I have seen that when the warmth dips under around 85 the worms will be up in the heap. In the colder time of year, they will generally be in the base focal point of the heap where it is the hottest. At that point in spring as the climate warms they will stir their way up.
Worms are covered with a disgusting bodily fluid. In the event that this sludge covering dries out the worms will bite the dust. They should be kept soggy consistently. I once had a break in the latrine drainpipe. At the point when we uncovered it, the whole region around the break was exceptionally wet and was loaded up with worms. Simultaneously, in the event that they are totally submerged in water, they will, after a period, suffocate.